# Controls
## Display
The display shows valuable information associated with the highlighted Functional Menu items.
We will explain the different information that will be displayed as we go through the description of each menu item.
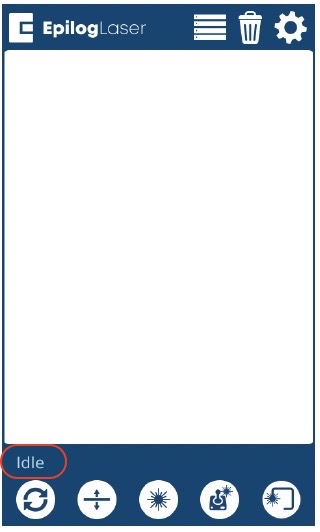
## Status Indicator
In the bottom left corner of the screen you will see text displaying the current status of the machine.
• **Homing**: This indicates the machine is still powering on. None of the functions are available until powering on is completed.
• **Idle**: The machine is inactive and ready to run or resume a job.
• **Running**: A job is in progress when this is displayed.
• **Parking**: The axis is returning to Home position.
• **Jogging**: Jog mode is active.
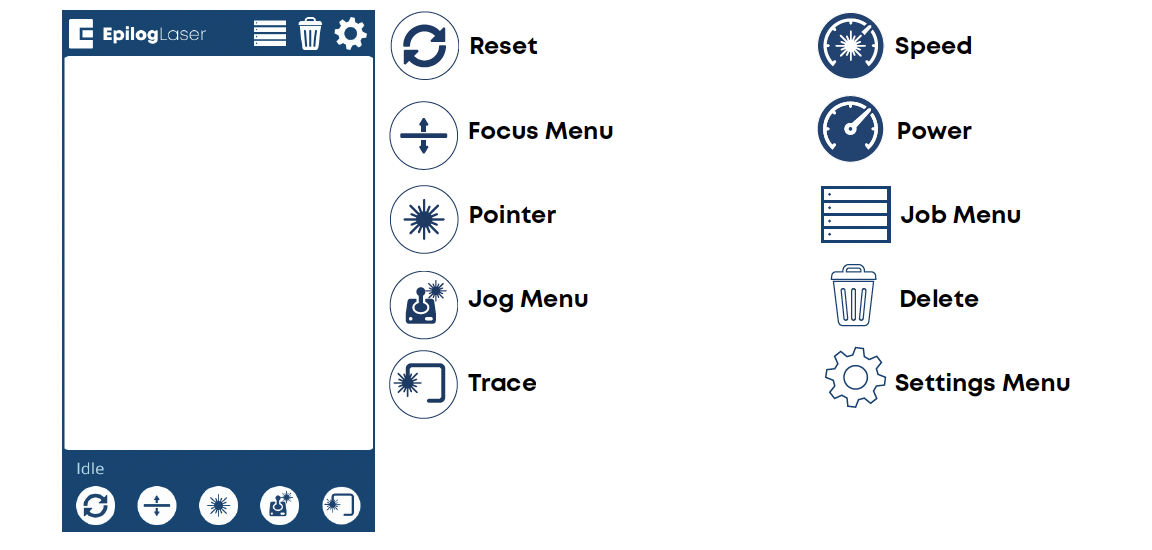
## Symbols
### Go/Stop Button
Press the Go/Stop button to start and pause a job.
{% hint style="info" %}
1. **Opening the door on the laser during engraving or cutting will stop the laser from firing; however, the lens carriage will continue to move.**
2. **It is important to stop the job before you open the door to ensure the engraving/cutting is completed.**
3. **If you press the Go/Stop button while in vector mode it may take some time for the system to actually stop.**
4. **The system needs to get to the next node in a vector before it can stop.**
{% endhint %}
### LED Status
The ring around the Go/Stop button will change certain colors depending on the Fusion Pro’s status.
• **White**: The machine is booting.
• **Purple**: The machine is waiting for the touch screen configuration to load.
• **Multi-colored**: The machine is Homing.
• **Alternating Light Blue to Green**: Machine is Idle and ready to run a job.
• **Green**: Machine is actively running or tracing a job.
• **Red**: A drive has failed. The number of flashes determines the drive number that failed. If more than one drive has failed, it flashes for the first sequential drive
1. X Axis
2. Y Left Axis
3. Y Right Axis
### Reset Key
Reset Key
• Press the Reset key to return the carriage to Home Position after moving it in Jog mode.
• Press this key to **restart a paused job.** The Reset button stops the engraving and returns the carriage to Home Position without erasing the job from memory.
### Focus
The Focus function lets you manually adjust the table height for engraving using the Focus Gauge. With Focus highlighted, use the Joystick to move the table up or down; the display shows the table position. Press once to enable Focus (icon turns green) and press again to exit.
### Pointer
The Pointer key toggles the laser system’s Red Dot Pointer.
### Jog
* The Jog function lets you move the laser head using the Joystick.
* Enable the Red Dot Pointer for a visual guide.
* The carriage moves in X, Y, or diagonally, with its position shown on the display.
* This helps focus the laser on any object on the table.
### Trace
The Trace function is a new feature that will be added soon. For now this key will be inactive.
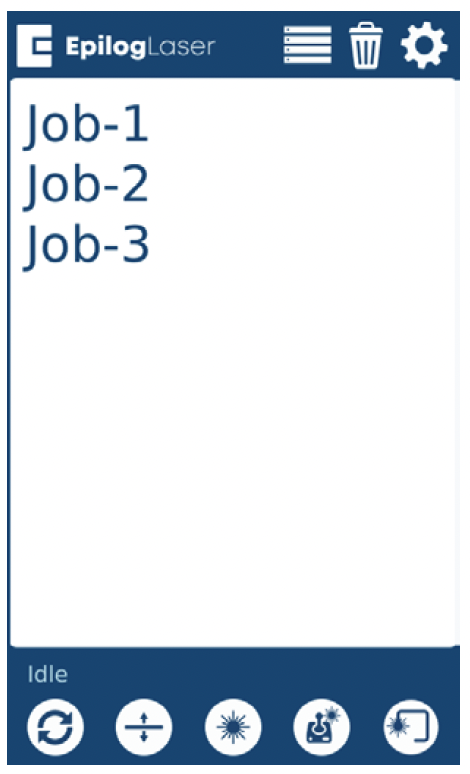
### Job Menu
• The Job Menu lets you view jobs sent to the laser system. The job names match the file names you printed to the laser.
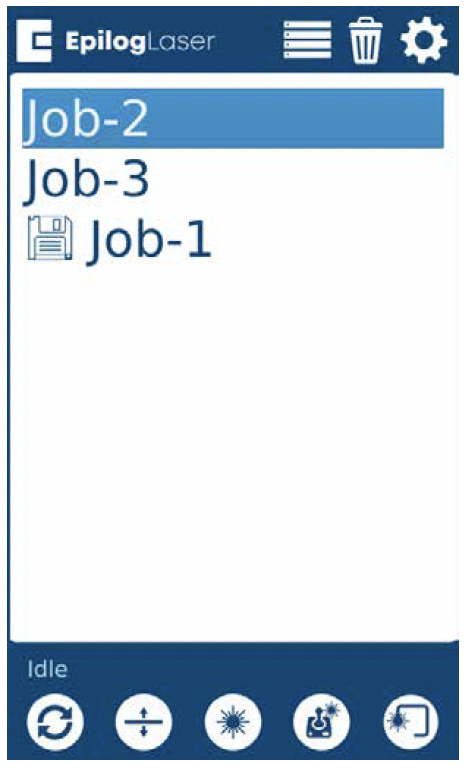
• When the job you want has been selected, it will be highlighted in blue. Press the Go/Stop button to start the job.
• After the job starts, settings and a timer will appear at the bottom. Saved jobs, indicated by a save icon, will always be visible at the top of the list.
{% hint style="info" %}
**Press and hold a job to view its settings (Speed, Power, Resolution/Frequency). Use the save button in the top-right to save the job permanently.**
{% endhint %}
### Speed
### Power
### DPI
### Frequency
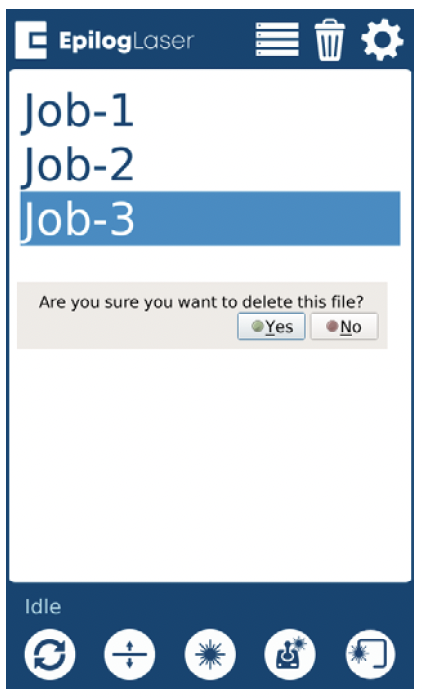
### Delete Button
To delete a job, select it in the Job Menu and click the Delete Button.
A dialog will pop up to confirm that you want to delete the file. Select “Yes” and the file will be removed from the Job Menu.
{% hint style="info" %}
**If you have marked a job as “Saved” and delete the**
**file, it will still be erased from the Job Menu.**
{% endhint %}
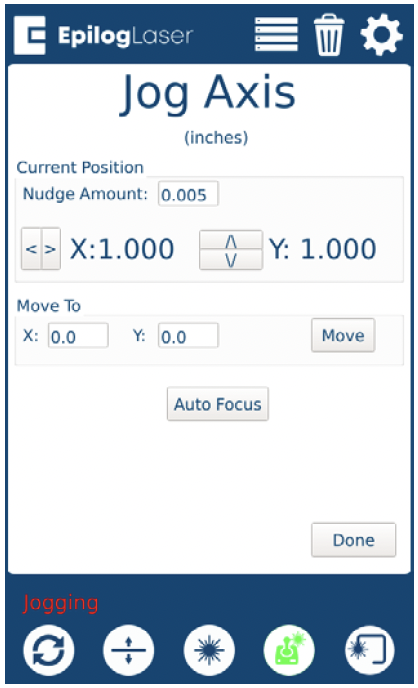
### Jog Menu
* Access the Jog Menu by pressing the Jog key, which will turn green when active.
* The Jog Menu allows you to adjust the current X and Y axis positions of the laser head.
* You may change the current position of the laser head either using the Joystick, or by entering precise coordinates.
* The Nudge arrows allow you to fine-tune the position down to a thousandth of an inch.
* Once you are finished using the Jog Menu, press the Jog key again to return to the main Job Menu.
* Press the Reset key to return the laser back to its home position.
### Auto Focus
Position the lens carriage above the material, press Auto Focus to engage the plunger. The table will lift until the material touches the plunger, setting it to the right height. Your job is now in focus.
{% hint style="info" %}
**If you are running a Dual Source job, use Auto Focus to focus the table to the height of the fiber portion of your workpiece.**
{% endhint %}
### Focus Menu
* To adjust the table height, press the Focus key (turns green when active).
* Use the Focus Menu to raise/lower the table for precise laser focusing with the Focus Gauge.
* Adjust the height using the joystick or Nudge arrows (down to a thousandth of an inch).
* Press the Focus key again to return to the main Job menu.
####


 ### Power
 ### DPI
 ### Frequency
 ### Delete Button